Fault description During the cutting process, the laser monitor suddenly alarmed. The equipment worked normally after restarting, but this alarm fault occurred intermittently during the cutting process, and the alarm frequency became higher and higher. Cause Analysis According to the working principle of the laser, there are 5 possible causes for this alarm based on preliminary analysis. (1) High-purity gas is impure, especially the moisture in the gas exceeds the standard. The entry of moisture into the resonant cavity will cause the plasma resistivity in the resonant cavity to decrease and the high-voltage power supply current to increase abnormally. (2) The resonant cavity leaks and the surrounding air enters the resonant cavity. The resonant cavity has a negative pressure during normal operation. If there is a leakage point, the surrounding air will enter the resonant cavity. (3) The heat exchanger or its sealing ring leaks, and the cooling water enters the resonant cavity. (4) The air mixture ratio is incorrect. Incorrect gas mixture ratio will cause the laser power to decrease. The laser will appropriately increase the high-voltage current of the power supply to increase the power. When the high-voltage current exceeds a certain range, an alarm will appear. (5) Vacuum pump reflux. If the one-way valve of the vacuum pump is not tightly sealed, the exhaust gas with oil vapor will flow back into the resonant cavity, staining the internal optical path components such as lenses, resulting in a decrease in power. Troubleshooting
(1) Change the gas to another laser and use it normally to eliminate the cause of gas impurity.
(2) Evacuate the resonant cavity to below 1 kPa (10 mbar) and close all solenoid valves. After 20 minutes, the pressure rises by 40 Pa (0.4 mbar), which meets the equipment factory requirements and eliminates the causes of leakage and heat exchanger leakage.
(3) Check the air mixture ratio and readjust it. After adjustment, the fault still exists and the frequency of occurrence has not decreased. The reason for incorrect air mixture ratio has been eliminated.
(4) Remove the pipeline between the vacuum pump and the resonant cavity and wipe it clean of oil stains. Remove the front mirror, tail mirror and folding mirror, scrub and reinstall and adjust them. If the fault still exists, eliminate the cause of vacuum pump backflow.
Re-investigation: Analyze and investigate the working status of the equipment. During the actual cutting process, observe the changes before “low voltage”. When the power rises to about 1200 W, it suddenly “drops high voltage”. Turn on the “warm-up” mode and gradually increase the warm-up power. When the power is set to 1500 W, the measured output power is only 1200 W, and a “drawing” phenomenon occurs in the 1# resonant cavity. After running for about 20 seconds, the laser displays a “low voltage” alarm. Check the laser power supply and displays an “over-current” alarm. The electronic components of the laser power supply were detected and found to be normal. Measuring the power supply monitoring circuit board, the detection voltage output of the 1# resonant cavity is 8.4 V, and the voltage of the 2# to 8# resonant cavities is about 7.6 V. It is judged that the oil-immersed voltage doubler power supply of the 1# resonant cavity is damaged. Disassemble the oil-immersed power pack and measure the 1# resonant cavity voltage doubling power transformer, voltage doubling capacitor, voltage doubling diode and other electronic components. There are no abnormalities. Measure the voltage drop detection circuit, and the measured value of one 100 kΩ resistor is 116 kΩ. It is initially determined that the cause of the “high voltage drop” alarm on the equipment is that the resistor is damaged.
Emergency measures: Remove a 100 kΩ, 2 W resistor from another old circuit board and replace the abnormal resistor. Turn on the warm-up mode and gradually increase the set power until the maximum power is 3000 W. Observing the working status of the laser, there is no “high voltage drop” alarm and no “drawing” phenomenon. Analysis of the real cause
(1) Detection of 2 lasers, a total of 16 voltage-reducing resistors, the resistance values are all larger than 5%. This resistor is a carbon film resistor. Carbon film resistors have low power and are easily oxidized by voltage shock. causing the resistance to gradually increase. Therefore, it is judged that it is unreasonable to use carbon film resistors when designing the circuit board here, and metal film resistors with stronger impact resistance and stability should be used.
(2) Other problems discovered during the investigation. The gas mixture ratio deviates greatly from the factory setting; the replacement and use of high-purity gas is not standardized.
Corrective and preventive measures
(1) Purchase a 100 kΩ, 2 W metal film resistor for replacement to avoid this fault.
(2) Modify the operation and maintenance instructions. Add regular testing items for power supply voltage and current; adjust the air mixture ratio, and add regular inspection and adjustment items; formulate requirements for the use of standard ventilation operation procedures, and publicize and implement training.
(3) Conduct third-party inspection of high-purity gases (N2, CO2, He2) used in lasers. Unqualified gases require suppliers to make rectifications within a time limit.
Analyzes possible causes from the five elements of human, machine, material, method and environment.
(1) person. The new employees are not skilled in operation and cannot deal with the warping of the plate in time or handle it improperly; the operator has a poor sense of responsibility and does not deal with the possible collision situation; the coaxial is not readjusted after the collision, causing the laser beam to deflect and burn. Bad capacitor head; the follower was not adjusted in time, causing another collision.
(2) Machine. The cutting head’s follow-up response is insensitive to collisions and cannot be stopped in time when a collision occurs, leading to the expansion of the accident.
(3) Material. The internal stress of the plate is large, and the plate is heated during cutting, and the stress is released, causing it to warp.
(4) Law. Insufficient consideration was given to the setting of the cutting path, and no consideration was given to avoiding parts prone to warping as much as possible; micro-connections were not used.
(5) Ring. Short plate storage racks, long storage times, and trampling by passers-by cause the plates to bend and easily warp during the cutting process.
Investigation and rectification
(1) Conduct training and assessment for all operators, and formulate corresponding reward and punishment systems.
(2) Adjust the follow-up sensitivity to the highest level without affecting use.
(3) Re-flatten the plate before loading on the machine to release part of the internal stress.
(4) When programming and typesetting, optimize the cutting path and try to avoid parts prone to warping; use micro-connections to reduce the probability of workpiece warping.
(5) Lengthen the plate storage rack to prevent the two ends from sinking and bending; re-plan the plate storage area and set up guardrails to prevent people from walking through. After the implementation of the above measures, the frequency of collision problems decreased slightly, but the problem was not completely solved.
Analyze video photos for troubleshooting
(1) The reason why this problem has not been solved for a long time is that the professionals were not at the scene when the collision occurred and could not restore the situation at that time. Subsequently, by installing monitoring equipment on the equipment and taking photos after each collision, the video and photo data were analyzed. The collisions all occurred after cutting a certain slit and then emptying to the starting point of the next slit. The cutting head will move upward for a certain distance (head height) before dry running. Try raising your head higher to solve the problem.
(2) Study control procedures. Observing the cutting program, we found that the dry running head is controlled by subroutines 1012 and 1022. Open the subroutine to analyze the control principle.
(3) Principle of cutting head height control. The sensor is used to calculate the height from the plate. When dry running is required, the Z-axis moves in the negative direction until it stops at a sensing height of 10 mm, and then the dry running action is performed.
Real cause analysis
(1) This control method has the following shortcomings: ① The sensor has an accurate sensing distance of 10 mm. The greater the distance, the greater the error. ② Collisions cannot be prevented, and operation can only be stopped after a collision occurs. ③ Using PID control, there is a response lag problem when a collision occurs, which leads to the expansion of collision accidents. ④ It can only sense the uniform changes in the height of the plate, but cannot sense the sudden change in the height of the plate. (2) Based on the photos of the collision scene taken by the operator, establish a digital graph model (Figure 4) to analyze the collision situation: a collision will occur when point a moves in any direction, and a collision will occur when point b moves to the left collision.
(3) According to the digital model, the maximum lift or subsidence height of the workpiece is calculated to be 30 mm, and the head height is set to 10 mm. It is impossible to completely avoid collision. However, with this current control method, it is impossible to set the head height above 10 mm.
Laser marking technology has emerged as a vital component in the automobile manufacturing sector, particularly within welding production lines. This innovative technology enhances the efficiency,
The textile industry has experienced a significant transformation with the advent of software cutting machines, which are increasingly becoming essential tools in modern manufacturing. These
Stone cutting is a vital process in the construction, architecture, and art industries, allowing for the creation of durable and aesthetically pleasing structures and sculptures.
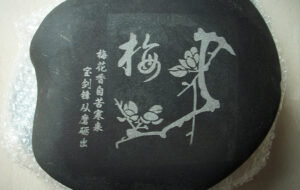
The stone carving industry has evolved significantly with the introduction of advanced stone cutting machines. These machines have transformed traditional stone processing methods, enabling artisans
The clothing industry has undergone significant transformations with the introduction of advanced technology, particularly in the area of fabric cutting. Software cutting machines, often integrated
Fabric sample cutting machines are essential tools in the textile industry, enabling precise and efficient cutting of fabric samples for various applications. Whether you are